Monday, October 29, 2018

Adobe Acrobat DC App-V & Windows 10 Issue - Resolved

Later have been seeing issues when removing earlier versions of Adobe Acrobat DC and installing newer version in windows 10 1703/1709 which has been explained very well in the below blog by Ryan Ververs-Bijkerk


https://www.logitblog.com/app-v-application-was-unable-to-start-correctly-on-windows-10/


The solution was to restart the machine and try again earlier. Now this is fixed with the release of new updates for windows 10.


1703 fixed in 2018.10 - KB4462939
1709 fixed in 2018.10 - KB4462932
1803 fixed in 2018.10 - KB4462933


Thanks to Tim Mangan for sharing this update information.

Thursday, July 12, 2018

Build your first MSIX Package using DAC

Microsoft is building up a MSIX Packaging Tool which we are expecting to be released pretty soon. Till then how to create a MSIX package? It's very easy. If you have used Desktop App Converter tool to create .appx package earlier then you are ready to create MSIX.

The steps to create MSIX are pretty same like how we create .appx using DAC. You can follow the below link to create your first MSIX package.

Project Centennial - First hands on Converting desktop apps to Universal Windows Platform (UWP)

There are some changes that needs to be followed regarding to requirements in the above link. Instead of writing those changes I have decided to share a link where it has been already well explained by Pascal Berger.

https://blog.basevision.ch/2018/07/how-to-create-an-msix-right-now-in-the-insider-preview-a-step-by-step-tutorial/

So why wait? Try out your first MSIX creation.

Saturday, June 16, 2018

Sequencing Google Chrome using App-V 5.1

1)  Launch the Microsoft Application Virtualization Sequencer from Start->Programs


2)  Select the "Standard application" type in the Type of Application to be Virtualized


3)  Select "Perform a custom installation" in the select installer screen


Provide the virtual application name as Google Chrome and click next.

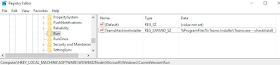
4)  Before the application is installed, make sure that the below registy entries are placed to disable the updates.

[HKEY_LOCAL_MACHINE\SOFTWARE\Policies\Google\Update]
"UpdateDefault=dword:00000000
"AutoUpdateCheckPeriodMinutes"=dword:0000000

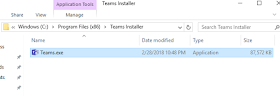
5)  Start the installation during monitoring phase.Install the package using source "GoogleChromeStandaloneEnterprise.msi"


After installation, perform the following steps.
- Delete the services : Google Update service (gupdate, gupdatem) using the below command in CMD ;
SC DELETE gupdate
SC DELETE gupdatem
- Remove the shortcut from desktop
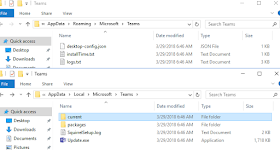
- Remove the folder Update from Program Files (x86) during monitoring phase, after installation and unpin the application from taskbar after first launch.

6) Click "I am finished Installing"


7) Launch the shortcut in the configure phase and perform any additional post configuration if needed.


To customize further like adding home page, start screen etc.. check this link.


8) Ensure that all the buttons are clicked and opened so that Maximum functions are captured in the "Feature block One" itself.

9) Click next.Select the OS as per the requirement and select continue to modify using package editor option.


10) Create a powershell script to add a registry in the local machine for single signon. Add the below script ( AddSigninreg.ps1 )  under the Package Files --> scripts tab in package editor.

set-location hklm:
new-itemproperty -path "HKLM:\software\policies\Google\Chrome\" -name "SigninAllowed" -propertytype dword -value 0 

Similarly  add the below script ( RemoveReg.ps1 ) 

Remove-Item -Path 'HKLM:\SOFTWARE\Policies\Google\Chrome' -Recurse


11) Save the package.

12) To execute the above scripts,  edit the Google Chrome_DeploymentConfig.xml file.

<MachineScripts>
      <AddPackage>
        <Path>powershell.exe</Path>
        <Arguments>-ExecutionPolicy Bypass -File ".\AddSigninreg.ps1"</Arguments>
        <Wait RollbackOnError="true"/>
      </AddPackage>

      <RemovePackage>
        <Path>powershell.exe</Path>
        <Arguments>-ExecutionPolicy Bypass -File ".\RemoveReg.ps1"</Arguments>
        <Wait RollbackOnError="true" />
      </RemovePackage>
    </MachineScripts>

13) Save the Google Chrome_DeploymentConfig.xml file.

14) Testing the package using standalone powershell.

Enable script execution in the App-V client using the below command in powershell.

Set-AppvClientConfiguration -EnablePackageScripts 1

Publish the Google Chrome App-V package:

Add-AppvClientPackage "path to .appv file" -Dynamicdeploymentconfiguration "path to Google Chrome_DeploymentConfig.xml" | Publish-AppvClientPackage -Global | mount-AppvClientPackage

Friday, May 11, 2018

MSIX - The future universal format

MSBuild 2018 has officially announced  the new msix format,  and so now it's free to share information publically to all.

Since there are already quite few blogs and video's shared in msbuild,  I will  be sharing those links below which will be quite very useful.

MSIX - Inside and Out

Accelerating Windows 10 enterprise app deployment through MSIX

MSIX - pptx

MSIX First Look - Priya Saxena

Is MSIX the future for App-V - Tim Mangan

A blog by Kevin Kaminski

MSIX Intro

A closer look at MSIX

MSIX But what about App-V?

Steps to create MSIX - Pascal Berger


To Join MSIX Tech Community click here

Thursday, March 29, 2018

Decrypting how Microsoft Teams new MSI works

Microsoft has released a windows Installer MSI for Microsoft Teams for deployment through SCCM.You can download it here


As per Microsoft Statement:


"The Teams MSI will place an installer in Program Files. Whenever a user signs into a new Windows User Profile, the installer will be launched and a copy of Teams application will be installed in that user's appdata folder. If a user already has the Teams app installed in the appdata folder, the MSI installer will skip the process for that user."


NOTE: Don't change the install location as it will break the process.


In this blog, I will explain how this happens by opening MSI using Installshield.


1. To Install Microsoft Teams, it first requires .net 4.5 or later to be installed in the machine. This check happens using Launch condition which also does a system search for .net registry to be present in the machine.


2. The MSI has only one file which is Teams.exe that gets installed to [ProgramFilesFolder]Teams Installer location.


3. It also has only one registry file which gets placed in Run key.So whenever a user logs in, the run key will trigger the command present in it. So in this case it triggers the Teams.exe -checkinstall


So after published through SCCM system context, you can find the Teams.exe installed in the following location.


Also a run key is created in the machine registry HKLM which will trigger the Teams.exe to check for files installed in %localappdata% if not present install the files and launch automatically.


User if logged in, needs to logoff/login again. If a new user logs in then the run key will trigger the install process in the background  and place the files in the below location and then launch automatically.


To perform a clean removal of files through SCCM, use the Powershell script from the below link.


https://docs.microsoft.com/en-us/microsoftteams/scripts/powershell-script-teams-deployment-clean-up

Wednesday, March 21, 2018

Exploring Advanced Installer Express free edition to convert legacy apps to UWP

Earlier back in 2016 when Microsoft released Project centennail, I have blogged about it which you can find here

To know more about Desktop bridge and UWP conversion have a look here


Recently Advanced Installer has released a free express edition which is a GUI based tool to simplify the process of converting legacy exe/msi to appx format.They have also stated to support the new MSIX format in their upcoming release.

You can download the free  Advanced Installer express version here.

Pre-Req: Install windows sdk from here 

After downloading install the windows sdk first and then install  the Advanced Installer express edition in a clean virtual machine.After Installing you will be prompted to register using your mail ID to get the free license .After validating click on new and select the Convert Desktop App as shown below and click next.


Provide the setup path (msi/exe) and add any parameters if you wish to add.In this example I have used google chrome msi package to convert to appx format.


Provide the output path or leave to default location.


After clicking Next, the tool will do pre-capture, install the google chrome msi and then do the post capture during the Installation monitoring phase.


Once done, click next. It will list out what all files,registries,scheduled tasks etc..
You can do cleanup in this section and then click import.


Click build icon to create uwp app.If there are any issues, it will show build failed.


You can see that in the below screen it says that the Appx package must be digitally signed to install.


I have ignored this warning and proceeded next.You can see the output files. Inside Google Chrome-BuildUwpAppx folder you can see the Google Chrome.appx file created.


To install the Google Chrome.appx, open elevated powershell window and run the below command.


Add-AppxPackage "Path to .AppX File"

You can see that the command fails stating that there is no valid digital signature.


For testing purpose, I have created a dummy certificate following the steps provided here


After that in the Advanced Installer project, I scrolled to Digital Signature tab and added the above created google.pfx file and selected enable signing option as shown below.


Click build option to add the certificate inside the output .appx file.Once done run the below command to test the output package.

Testing :Open elevated powershell and run the below command.

Add-AppxPackage "Path to .AppX File"

This will install the package successfully.If you are facing issues during Install because of certificates, follow these steps as mentioned here.

From my testing I found the below Pro's using the Advanced Installer express edition.

1. User Friendly GUI which makes even a beginner to convert legacy apps to UWP easily.
2. No need of docker image and desktop bridge powershell commands to convert anymore. We can install the Advanced Installer application in the virtual machine and use it directly to convert.
3. With the same project we can also create msi/exe output files (makes life easy).
4. Highlights the issues found during build phase which really helps us to easily resolve it.

Con's:

1. Install Monitoring Phase takes quite some time which can be made faster.

So why wait, go and grab the free Advanced Installer express edition and convert your legacy apps to UWP easily.
 

Wednesday, March 14, 2018

Adobe Illustrator error 16 - Fix

When launching sequenced Adobe illustrator shortcut we see the below issue in the App-V client machine.


Reason: This is due to UAC and the application requires to be run as administrator.

Solution: To test manually Click Start > All Programs. Right click on the Adobe Illustrator shortcut  and click Run As Administrator. The shortcut will launch without any error.

So how to resolve this in the App-V 5.x package? We need to suppress the UAC prompt when run as administrator using RunAsInvoker or other shims.

Check my another blog for more information to solve this issue here

Monday, March 5, 2018

HotFix Released: App-V Applications worked in win 10 1607 fails in win 10 1703

Many packages that completely worked in inbox App-V in windows 10 1607 failed after upgrading to windows 10 1703. The reason for failure is due to Microsoft changed the way to load registries in containers CREG instead of usual virtual registry VREG.

There was a temporary fix which was available and Roy Essers posted it in twitter a long back.
It was adding the below registry entry manually in the 1703/1709 machines.


[HKEY_LOCAL_MACHINE\SOFTWARE\Microsoft\AppV\Client\Compatibility]
"RegistryCompatibilityMode"=dword:00000001


This issue is fixed in windows 10 1703 with the new hotfix released.


https://support.microsoft.com/en-us/help/4077528


We can clearly see that they have made use of the temporary fix to change the registry virtualization to use the VREG instead of the modern CREG that was mentioned earlier to permanently fix this issue.


Apart from the registry fix, this update also fixes many other App-V issues which can bee seen below.


This update will be downloaded and installed automatically from Windows Update.

Thursday, February 22, 2018

Solution for Error 17002 when uninstalling Office 365 (2016) when apps like word, excel, outlook are open

When uninstalling office 365 silently, it is failing only when any applications like word, excel are kept open. This is because during uninstall, office checks for any running applications and prompts the user to close it which is not happening in silent uninstall.


When uninstalling in UI mode, it prompts to close when any office apps are open. Since in silent mode office is not able to do this, it fails with an error code 17002.


You can check in the log file for the error code 17002.


To overcome this just add the property FORCEAPPSHUTDOWN with Value="True" in the uninstall config.xml file. This property will force shutdown any running office apps.


Example:


<Configuration>
 <Remove>
 <Product ID="O365ProPlusRetail" >
 <Language ID="en-us" />
  </Product>
 </Remove>
<Property Name="FORCEAPPSHUTDOWN" Value="TRUE" />
<Display Level="None"/>
<Logging Path="c:\temp\" Name="Uninstall.log"/>
</Configuration>


NOTE:


Place  the  <Property Name="FORCEAPPSHUTDOWN" Value="True" /> part after  the <Remove>... </Remove> tags. If it is placed in between <Remove>... </Remove> tags, then it wont work.


You can use the below online configuration xml editor to avoid issues when editing the XML file.


http://officedev.github.io/Office-IT-Pro-Deployment-Scripts/XmlEditor.html

Tuesday, February 13, 2018

App-V: Virtual Packages works in win 10 1607 but fails in windows 10 1703/1709

Many packages that completely worked in inbox App-V in windows 10 1607 failed after upgrading to windows 10 1703 and 1709 versions. The reason for failure is due to Microsoft changed the way to load registries in containers CREG instead of usual virtual registry VREG. To know about this change do have a look at the below articles from Tim Mangan.

http://www.tmurgent.com/TmBlog/?p=2692
http://www.tmurgent.com/TmBlog/?p=2733

There was a temporary fix which was available and Roy Essers posted it in twitter a long back.
It was adding the below registry entry manually in the 1703/1709 machines.


[HKEY_LOCAL_MACHINE\SOFTWARE\Microsoft\AppV\Client\Compatibility]
"RegistryCompatibilityMode"=dword:00000001


Microsoft has released an update earlier today which is supposed to fix this registry mapping issue.
https://support.microsoft.com/en-us/help/4074588


We can clearly see that they have made use of the temporary fix to change the registry virtualization to use the VREG instead of the modern CREG that was mentioned earlier to permanently fix this issue.


Apart from the registry fix, this update also fixes many other App-V issues which can bee seen below.


This update will be downloaded and installed automatically from Windows Update. If you would like to use the standalone package for this update, download it from the below link.


http://www.catalog.update.microsoft.com/Search.aspx?q=KB4074588

NOTE: This fix is supposed to be only for windows 10 1709. The article haven't mentioned anything about windows 10 1703. Will do a check in windows 10 1703/1709 and update how the fix has really helped to solve the issue.


Update: This issue is also fixed in windows 10 1703 with the new hotfix released.


https://support.microsoft.com/en-us/help/4077528


Wednesday, January 31, 2018

Virtual Google Chrome and Local o365 issues - Solution

After publishing Google Chrome App-V package in windows 7, logging into portal.office.com and opening a word or excel document and trying to edit it with locally installed Office 0365 fails. When checked with procmon, we can see that Google Chrome virtual package is able to see the local o365 package and tries to open it but the winword.exe process closes soon with exit code 1.


As in last blog,  I have detailed about the same issue happening with Appv-d Mozilla Firefox package and local o365.The solutions are still the same for the current scenario too. 

Solution 1:

Create the AllowJitvInAppvVirtualizedProcess registry key as shown below to fix this known issue.


Windows Registry Editor Version 5.00

[HKEY_LOCAL_MACHINE\SOFTWARE\Microsoft\ClickToRun\OverRide]
"AllowJitvInAppvVirtualizedProcess"=dword:00000001

If it doesn't work try in wow6432Node registry.


Windows Registry Editor Version 5.00

[HKEY_LOCAL_MACHINE\SOFTWARE\Wow6432Node\Microsoft\ClickToRun\OverRide]
"AllowJitvInAppvVirtualizedProcess"=dword:00000001


Solution 2:

If Solution 1 doesn't work , try with the latest App-V 5.1 Hot Fix. Always make sure to use the latest App-V 5.1 Hot Fix. (A minimum of Hot Fix 4 is required for this issue to be resolved.)

You can download the latest Hot Fix here: KB4018510

Tested the same scenario in Windows 10 1607, only the AllowJitvInAppvVirtualizedProcess registry key is required.

NOTE: Fixes that are delivered to the “out-of-box” versions of App-V and UE-V are first delivered for the “in-box” versions of App-V and UE-V in the monthly Windows 10 cumulative updates.Since updates are provided to windows 10 in-box App-V client first, it will not require the installation of the latest Hot-Fix.

From Windows 10 1703, this AllowJitvInAppvVirtualizedProcess registry key will be automatically added when any of the Office product starts.