Microsoft has released a windows Installer MSI for Microsoft Teams for deployment through SCCM.You can download it here
As per Microsoft Statement:
"The Teams MSI will place an installer in Program Files. Whenever a user signs into a new Windows User Profile, the installer will be launched and a copy of Teams application will be installed in that user's appdata folder. If a user already has the Teams app installed in the appdata folder, the MSI installer will skip the process for that user."
NOTE: Don't change the install location as it will break the process.
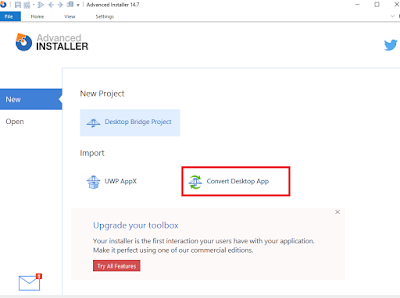
In this blog, I will explain how this happens by opening MSI using Installshield.
1. To Install Microsoft Teams, it first requires .net 4.5 or later to be installed in the machine. This check happens using Launch condition which also does a system search for .net registry to be present in the machine.


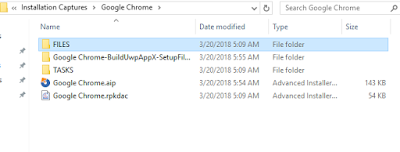
2. The MSI has only one file which is Teams.exe that gets installed to [ProgramFilesFolder]Teams Installer location.

3. It also has only one registry file which gets placed in Run key.So whenever a user logs in, the run key will trigger the command present in it. So in this case it triggers the Teams.exe -checkinstall

So after published through SCCM system context, you can find the Teams.exe installed in the following location.

Also a run key is created in the machine registry HKLM which will trigger the Teams.exe to check for files installed in %localappdata% if not present install the files and launch automatically.

User if logged in, needs to logoff/login again. If a new user logs in then the run key will trigger the install process in the background and place the files in the below location and then launch automatically.

To perform a clean removal of files through SCCM, use the Powershell script from the below link.
https://docs.microsoft.com/en-us/microsoftteams/scripts/powershell-script-teams-deployment-clean-up
As per Microsoft Statement:
"The Teams MSI will place an installer in Program Files. Whenever a user signs into a new Windows User Profile, the installer will be launched and a copy of Teams application will be installed in that user's appdata folder. If a user already has the Teams app installed in the appdata folder, the MSI installer will skip the process for that user."
NOTE: Don't change the install location as it will break the process.
In this blog, I will explain how this happens by opening MSI using Installshield.
1. To Install Microsoft Teams, it first requires .net 4.5 or later to be installed in the machine. This check happens using Launch condition which also does a system search for .net registry to be present in the machine.
2. The MSI has only one file which is Teams.exe that gets installed to [ProgramFilesFolder]Teams Installer location.
3. It also has only one registry file which gets placed in Run key.So whenever a user logs in, the run key will trigger the command present in it. So in this case it triggers the Teams.exe -checkinstall
So after published through SCCM system context, you can find the Teams.exe installed in the following location.
Also a run key is created in the machine registry HKLM which will trigger the Teams.exe to check for files installed in %localappdata% if not present install the files and launch automatically.
User if logged in, needs to logoff/login again. If a new user logs in then the run key will trigger the install process in the background and place the files in the below location and then launch automatically.
To perform a clean removal of files through SCCM, use the Powershell script from the below link.
https://docs.microsoft.com/en-us/microsoftteams/scripts/powershell-script-teams-deployment-clean-up