Earlier back in 2016 when Microsoft released Project centennail, I have blogged about it which you can find here
To know more about Desktop bridge and UWP conversion have a look here
Recently Advanced Installer has released a free express edition which is a GUI based tool to simplify the process of converting legacy exe/msi to appx format.They have also stated to support the new MSIX format in their upcoming release.
You can download the free Advanced Installer express version here.
Pre-Req: Install windows sdk from here
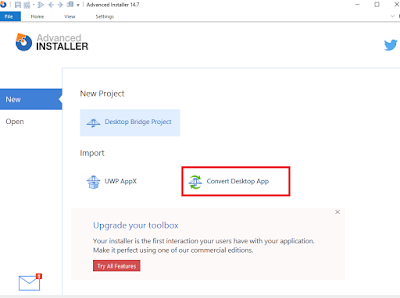
After downloading install the windows sdk first and then install the Advanced Installer express edition in a clean virtual machine.After Installing you will be prompted to register using your mail ID to get the free license .After validating click on new and select the Convert Desktop App as shown below and click next.
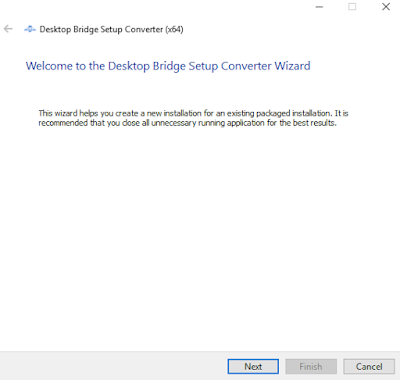
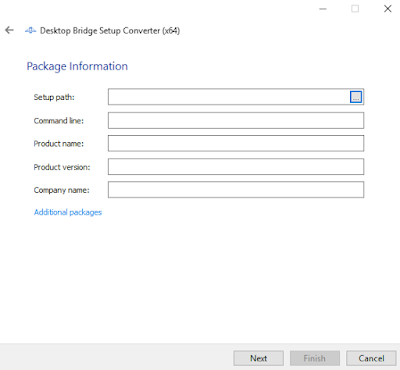
Provide the setup path (msi/exe) and add any parameters if you wish to add.In this example I have used google chrome msi package to convert to appx format.
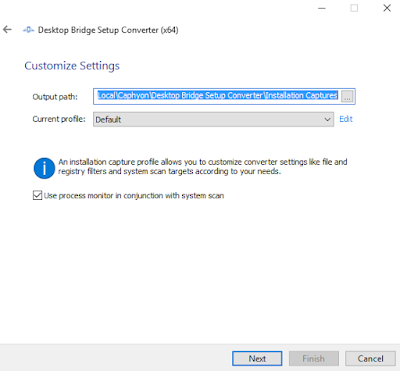
Provide the output path or leave to default location.
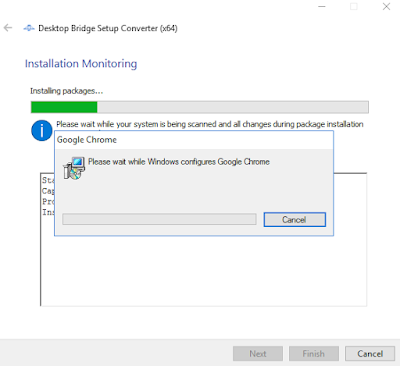
After clicking Next, the tool will do pre-capture, install the google chrome msi and then do the post capture during the Installation monitoring phase.
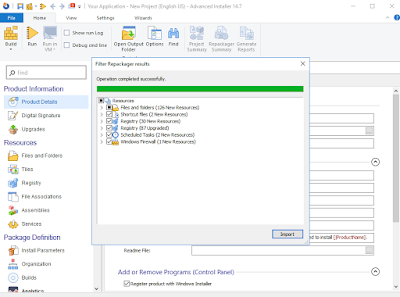
Once done, click next. It will list out what all files,registries,scheduled tasks etc..
You can do cleanup in this section and then click import.
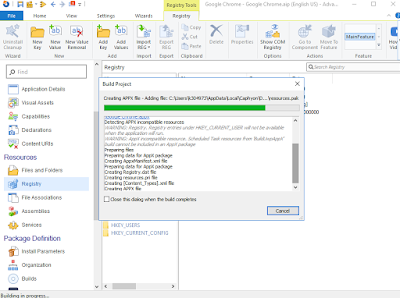
Click build icon to create uwp app.If there are any issues, it will show build failed.
You can see that in the below screen it says that the Appx package must be digitally signed to install.
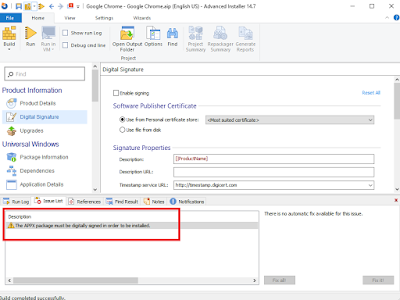
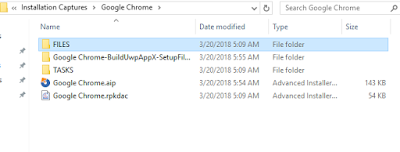
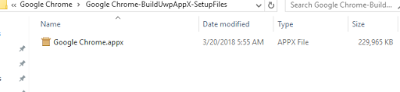
I have ignored this warning and proceeded next.You can see the output files. Inside Google Chrome-BuildUwpAppx folder you can see the Google Chrome.appx file created.
To install the Google Chrome.appx, open elevated powershell window and run the below command.
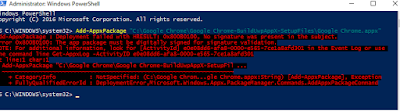
You can see that the command fails stating that there is no valid digital signature.
After that in the Advanced Installer project, I scrolled to Digital Signature tab and added the above created google.pfx file and selected enable signing option as shown below.
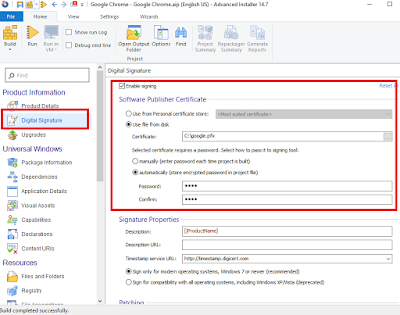
Click build option to add the certificate inside the output .appx file.Once done run the below command to test the output package.
This will install the package successfully.If you are facing issues during Install because of certificates, follow these steps as mentioned here.
From my testing I found the below Pro's using the Advanced Installer express edition.
1. User Friendly GUI which makes even a beginner to convert legacy apps to UWP easily.
2. No need of docker image and desktop bridge powershell commands to convert anymore. We can install the Advanced Installer application in the virtual machine and use it directly to convert.
3. With the same project we can also create msi/exe output files (makes life easy).
4. Highlights the issues found during build phase which really helps us to easily resolve it.
Con's:
1. Install Monitoring Phase takes quite some time which can be made faster.
So why wait, go and grab the free Advanced Installer express edition and convert your legacy apps to UWP easily.
To know more about Desktop bridge and UWP conversion have a look here
Recently Advanced Installer has released a free express edition which is a GUI based tool to simplify the process of converting legacy exe/msi to appx format.They have also stated to support the new MSIX format in their upcoming release.
You can download the free Advanced Installer express version here.
Pre-Req: Install windows sdk from here
After downloading install the windows sdk first and then install the Advanced Installer express edition in a clean virtual machine.After Installing you will be prompted to register using your mail ID to get the free license .After validating click on new and select the Convert Desktop App as shown below and click next.
Provide the setup path (msi/exe) and add any parameters if you wish to add.In this example I have used google chrome msi package to convert to appx format.
Provide the output path or leave to default location.
After clicking Next, the tool will do pre-capture, install the google chrome msi and then do the post capture during the Installation monitoring phase.
Once done, click next. It will list out what all files,registries,scheduled tasks etc..
You can do cleanup in this section and then click import.
Click build icon to create uwp app.If there are any issues, it will show build failed.
You can see that in the below screen it says that the Appx package must be digitally signed to install.
I have ignored this warning and proceeded next.You can see the output files. Inside Google Chrome-BuildUwpAppx folder you can see the Google Chrome.appx file created.
To install the Google Chrome.appx, open elevated powershell window and run the below command.
Add-AppxPackage "Path to .AppX File"
You can see that the command fails stating that there is no valid digital signature.
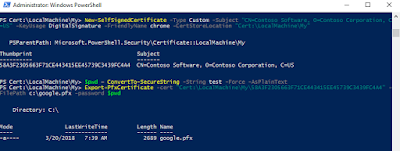
For testing purpose, I have created a dummy certificate following the steps provided here
After that in the Advanced Installer project, I scrolled to Digital Signature tab and added the above created google.pfx file and selected enable signing option as shown below.
Click build option to add the certificate inside the output .appx file.Once done run the below command to test the output package.
Testing :Open elevated powershell and run the below command.
Add-AppxPackage "Path to .AppX File"
This will install the package successfully.If you are facing issues during Install because of certificates, follow these steps as mentioned here.
From my testing I found the below Pro's using the Advanced Installer express edition.
1. User Friendly GUI which makes even a beginner to convert legacy apps to UWP easily.
2. No need of docker image and desktop bridge powershell commands to convert anymore. We can install the Advanced Installer application in the virtual machine and use it directly to convert.
3. With the same project we can also create msi/exe output files (makes life easy).
4. Highlights the issues found during build phase which really helps us to easily resolve it.
Con's:
1. Install Monitoring Phase takes quite some time which can be made faster.
So why wait, go and grab the free Advanced Installer express edition and convert your legacy apps to UWP easily.


