Showing posts with label msi. Show all posts

Wednesday, March 21, 2018

Exploring Advanced Installer Express free edition to convert legacy apps to UWP

Earlier back in 2016 when Microsoft released Project centennail, I have blogged about it which you can find here

To know more about Desktop bridge and UWP conversion have a look here


Recently Advanced Installer has released a free express edition which is a GUI based tool to simplify the process of converting legacy exe/msi to appx format.They have also stated to support the new MSIX format in their upcoming release.

You can download the free  Advanced Installer express version here.

Pre-Req: Install windows sdk from here 

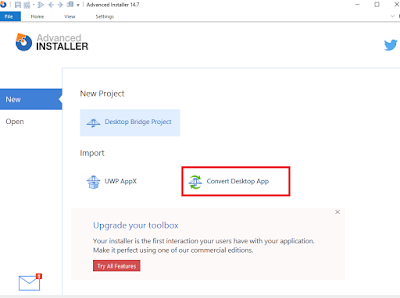
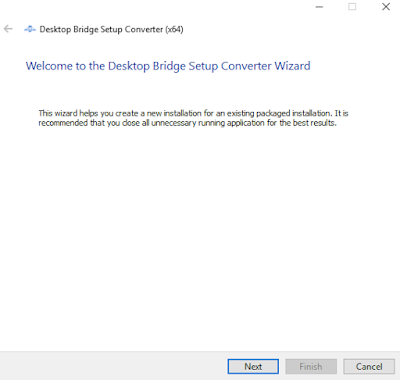
After downloading install the windows sdk first and then install  the Advanced Installer express edition in a clean virtual machine.After Installing you will be prompted to register using your mail ID to get the free license .After validating click on new and select the Convert Desktop App as shown below and click next.


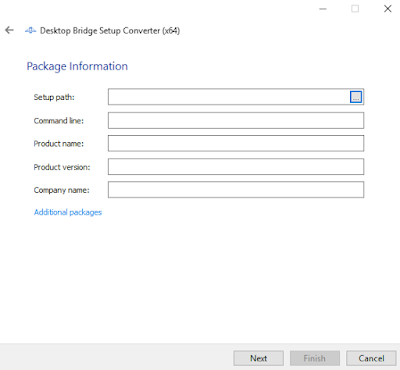
Provide the setup path (msi/exe) and add any parameters if you wish to add.In this example I have used google chrome msi package to convert to appx format.

Provide the output path or leave to default location.
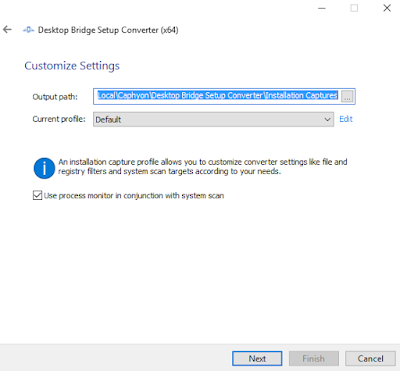

After clicking Next, the tool will do pre-capture, install the google chrome msi and then do the post capture during the Installation monitoring phase.
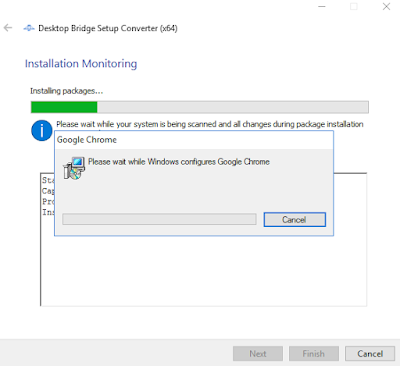

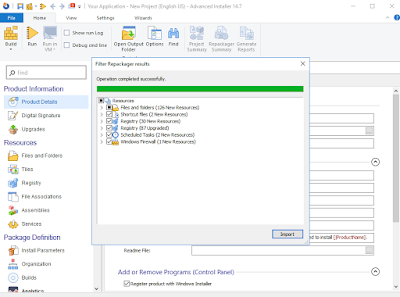
Once done, click next. It will list out what all files,registries,scheduled tasks etc..
You can do cleanup in this section and then click import.


Click build icon to create uwp app.If there are any issues, it will show build failed.
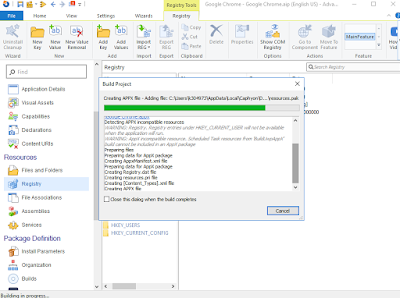


You can see that in the below screen it says that the Appx package must be digitally signed to install.
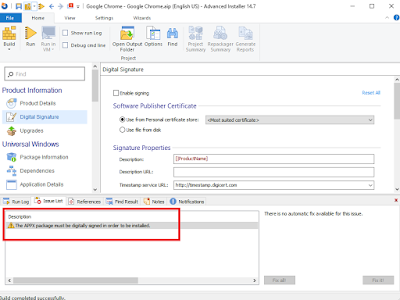

I have ignored this warning and proceeded next.You can see the output files. Inside Google Chrome-BuildUwpAppx folder you can see the Google Chrome.appx file created.
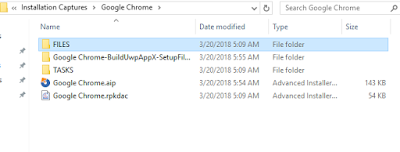
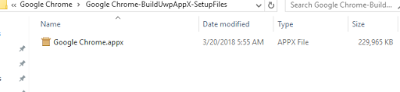


To install the Google Chrome.appx, open elevated powershell window and run the below command.


Add-AppxPackage "Path to .AppX File"

You can see that the command fails stating that there is no valid digital signature.
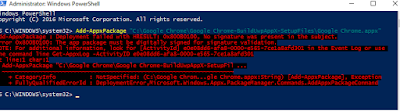


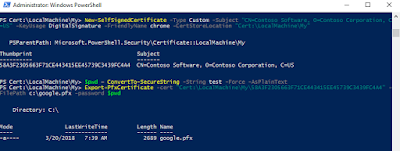
For testing purpose, I have created a dummy certificate following the steps provided here


After that in the Advanced Installer project, I scrolled to Digital Signature tab and added the above created google.pfx file and selected enable signing option as shown below.
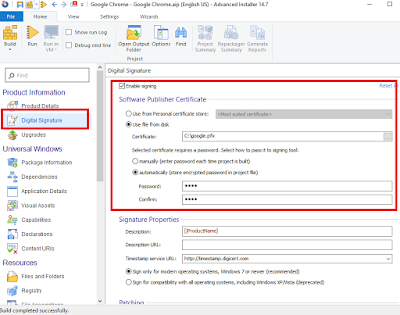

Click build option to add the certificate inside the output .appx file.Once done run the below command to test the output package.

Testing :Open elevated powershell and run the below command.

Add-AppxPackage "Path to .AppX File"

This will install the package successfully.If you are facing issues during Install because of certificates, follow these steps as mentioned here.

From my testing I found the below Pro's using the Advanced Installer express edition.

1. User Friendly GUI which makes even a beginner to convert legacy apps to UWP easily.
2. No need of docker image and desktop bridge powershell commands to convert anymore. We can install the Advanced Installer application in the virtual machine and use it directly to convert.
3. With the same project we can also create msi/exe output files (makes life easy).
4. Highlights the issues found during build phase which really helps us to easily resolve it.

Con's:

1. Install Monitoring Phase takes quite some time which can be made faster.

So why wait, go and grab the free Advanced Installer express edition and convert your legacy apps to UWP easily.
 

Friday, November 25, 2016

Advanced Installer 13.3 - fixes MSI launch condition issue in Windows 10 anniversary update 1607

Earlier when trying to install the Advanced Installer created virtual package through MSI format in windows 10 anniversary update 1607, it failed to install with the below error.


This issue is caused because of a launch condition in MSI which has been set to check for App-V client installed as a pre-requisite. Since App-V comes inbox with windows 10 v1607, the pre-req check fails with the above error.

This was a known issue even with App-V created packages and it was reported back to Microsoft.

Meantime I had a chance to talk with the Advanced Installer team about this issue. They quickly reported that they will look into this issue ASAP and come back with a fix. To my wonder they released an update within a short time period. You can have a look on their release note about this bug fix.

http://www.advancedinstaller.com/release-13.3.html

Now using Advanced Installer 13.3 when you create a virtual package and use the MSI to install in windows 10 1607, it installs fine without any issue. I tested with few apps sequenced by Advanced Installer 13.3 and found it to be 100% success.


So I looked into the MSI created after virtualizing and saw that it had the same launch condition but with a different approach. They have used the APPV_5X_CLIENT_INSTALLED property which has been set using AppSearch.


In this case they have used to locate the registry existence (HKLM\Software\Microsoft\AppV\Client).


Since windows 10 has inbuilt App-V, it  has a registry for AppV with version 5.2.0.0 by default.


Now when you install the new Advanced Installer 13.3 created virtual package MSI, the launch condition gets satisfied as there is a registry key with a valid  version and so it gets installed successfully.


For earlier versions, it still fails. For now you can fix it using the below solutions.


Solution - Virtual applications packaged into MSI format doesn’t install on inbox App-V client in Windows 10 Anniversary update 1607


UPDATED LINK -https://technet.microsoft.com/en-us/itpro/windows/manage/appv-release-notes-for-appv-for-windows

Monday, October 24, 2016

Solution - Virtual applications packaged into MSI format doesn’t install on inbox App-V client in Windows 10 Anniversary update 1607

We see that the solution provided in the link from Microsoft for the msi (sequenced with App-V 5.1 or earlier) failure in windows 10 v1607 doesn't seem to fix the issue.


https://technet.microsoft.com/en-us/itpro/windows/manage/appv-release-notes-for-appv-for-windows

We see the below Msidb.exe not found error running the command as said in the link.


When checked for Msidb.exe, it was found in c:\program files(x86)\windows kits\10\bin. Changed the -msidbpath to c:\program files(x86)\windows kits\10\bin and tested. It fails too. Changed it to c:\program files(x86)\windows kits\10\bin\msidb.exe. It fails too.


The update-AppvMsiPackage.ps1 from C:\Program Files (x86)\Windows Kits\10\Microsoft Application Virtualization\Sequencer seems to look for the location c:\program files(x86)\windows kits\10\bin\msidb.exe which is not located after installing the windows 10 sdk. The actual path where the msidb.exe is located after installing windows 10 sdk is c:\program files(x86)\windows kits\10\bin\x86\msidb.exe


The above highlighted code needs to be changed to $msidbExe = Join-Path -Path $msSdkPath -ChildPath "Bin\x86\MsiDb.exe"

Save the modified code and run the command. Now the solution works fine and the MSI gets updated.


Friday, April 15, 2016

Resolution - App-V generated MSI shows Client version 5.0 or above needs to be installed even though App-V Client is enabled in Windows 10 Build 14316

Even though App-V client is installed and been enabled, running the App-V generated msi shows the below error.


Resolution: Create a transforms for the generated MSI and remove the highlighted Installed OR APPV_CLIENT_INSTALLED launch condition.This should fix the issue temporarily.
For a permanent fix we need to wait for Microsoft to release its updated OS.


Wednesday, March 9, 2016

App-V 5.1 and App-V 5.0 SP3 generated MSI doesn't install without Administrator privileges Error code 0300000102- Solution

Question: When trying to run the App-V 5.1 or App-V 5.0 SP3 created MSI in the client machine, it fails with the error code 0300000102. How to resolve this.


Corresponding Event log:


Solution: Try running the CMD as Administrator and from here run the MSI file.This will resolve the issue. The MSI requires Admin privileges to run in the client machine.


Ok, now this works but what might be the reason? This comes into everyone's mind. Let me explain further.


Opened the App-V 5.1 sequenced MSI package and first checked in the Launch Condition table using ORCA. I see that there is a Privileged condition. I removed it by creating a Transforms file for the MSI. Tried Installing again and even this time it failed.


Analyzed further by opening the MSI template file for App-V 5.0 SP2. The msi will be located in C:\Program Files\Microsoft Application Virtualization\Sequencer\en-US


I see that the Custom Action PublishPackage32 and PublishPackage64 has Type to run in deferred execution in system context (3073)


Now opened the MSI template file for App-V 5.1 and see that those Custom Action PublishPackage32 and PublishPackage64 has Type to run in deferred execution (1025)


Ok now I have found a reason. It's time to test it. I created a Transforms file for the App-V 5.1 generated MSI package (Testpackage.msi) and changed the type for PublishPackage32 and PublishPackage64 to run in deferred execution in system context.


Tried installing the MSI with the created Transforms file (MST). Viola!! it works fine without the need for CMD as admin.


The same applies for RemovePackage32 and RemovePackage64 custom action also. This method works great for App-V 5.0 SP3 generated MSI also.


NOTE:


I heard from Dan Gough that he has created a Transforms file (MST) which would automate this case and resolves the need for Run as Admin. In addition to that he has also added support to include the deployment config.xml file too when installing. Hopefully he will be releasing it officially by this month. Once he releases it, I will be updating this blog with his Link to download the MST file.
 

Friday, October 9, 2015

How to write to 64bit registry path from a 32bit MSI using a MST(Transforms)

Question : I have a 32bit MSI. I want to add a registry. The registry should be installed to 64bit registry section. How I can do it using Transforms in Installshield?


Answer : Make the component having the registry as 64-bit component and change the template summary. Note keep only the registry that needs to be in 64 bit, and move all other files or registry to another component.


Steps:


Using Installshield:


1. Check for the registry that needs to be installed to 64 bit location. Fetch its component name.


mCc65z.png


2. Go to the respective component and make it as 64 -bit as shown below. Do read the instructions pointed below in arrow mark.


fme6Fs.png


3. Save the transforms and validate it for any errors. Since we have added a 64 -bit component,
validation will show ICE 80 error.


cQMqrs.png


4) To resolve the error, go to template summary and change the value to Intel64;1033.


WWEp1Q.png


5) Test for the functionality by executing the msi command along with the transforms file.
msiexec.exe /I "path to msi" TRANSFORMS="path to transforms file" /qb!


NOTE: Since the MSI is meant to be 32-bit, you can ignore the ICE 80 error instead of messing up with the MSI and changing its behavior and just document the acceptance of the ICE80.

Wednesday, October 7, 2015

Disable file transfer in Microsoft Skype 7.3.0 - MSI

After installing Skype, users can send files to different network by right clicking on file and selecting Skype to send context menu.


In order to prevent file transfer through skype, add the following registry


HKEY_LOCAL_MACHINE\SOFTWARE\Policies\Skype\Phone
add a dword "DisableFileTransfer" with value 1

Monday, April 13, 2015

How to package Adobe Photoshop Elements 8.0

1. Delete Desktop Shortcut
2. Remove the custom action for Launch Condition "Install [ProductName] by using the Setup.exe in the root folder."
3. Include "Elements.ini" to suppress select country window that will appear after launch of shortcut.
4. Change property AgreeToLicense No to Yes
5. Change property ACCEPTEDEULA 0 to 1
6.Change property  DISABLEOLSFEATURES 0 to 1
7. Change property DISABLEEMSFEATURES 0 to 1
8. Step to suppress EULA,Registration,Updates:

Create "application.xml.override" file and place in Adobe folder with the following contents.
            <?xml version="1.0" encoding="UTF-8"?>
            <Configuration>
            <Payload>
            <Data key="EULA">Suppress</Data>
            <Data key="Serial" protected="0">xxx--yyy--zzz </Data>
            <Data key="Registration">Suppress</Data>
            <Data key="Updates">Suppress</Data>
            </Payload>
            </Configuration>

Yahoo Messenger 11 - To disable 'Send File' (File Transfer) option.

Step to disable the “Send File ” (file transfer) option in Yahoo messenger 11.

Edit the “res_msgr.dll” and disable the “Send File” option.

Steps:
1.      edit  res_msgr.dll  using ‘PE explorer ‘. (download 'PE explorer' fromww.heaventools.com)
       
       2.       click on View -> Select ‘Resources’ -> select 'Menu' from drop down -> under 'menu', Select
                 "431" and double click on '431' -> which pops a dialog where you get a option to 'deselect'
                  "Send file" option

Info:
1.       Event ‘431’ is responsible for “Send File” functionality.
2.        when we select "431"  and look at the right side panel for script, under which "Action" function is scripted for    "Send Files"  (deselecting the 'Send Files' option will edit the script/Code as ("SEND FILE"= "INACTIVE")

Skype - Disable File Transfer

To disable file transfer through Skype, you need to create this entry in registry HKLM\Software\Policies\Skype\Phone
Create a Dword  DisableFileTransfer with a value 1

You can change HKLM (local machine) to HKCU to disable file transfer for current user only.


Don't forget to restart Skype after applying changes to registry.