Showing posts with label Sequencing. Show all posts

Saturday, June 16, 2018

Sequencing Google Chrome using App-V 5.1

1)  Launch the Microsoft Application Virtualization Sequencer from Start->Programs


2)  Select the "Standard application" type in the Type of Application to be Virtualized


3)  Select "Perform a custom installation" in the select installer screen


Provide the virtual application name as Google Chrome and click next.

4)  Before the application is installed, make sure that the below registy entries are placed to disable the updates.

[HKEY_LOCAL_MACHINE\SOFTWARE\Policies\Google\Update]
"UpdateDefault=dword:00000000
"AutoUpdateCheckPeriodMinutes"=dword:0000000

5)  Start the installation during monitoring phase.Install the package using source "GoogleChromeStandaloneEnterprise.msi"


After installation, perform the following steps.
- Delete the services : Google Update service (gupdate, gupdatem) using the below command in CMD ;
SC DELETE gupdate
SC DELETE gupdatem
- Remove the shortcut from desktop
- Remove the folder Update from Program Files (x86) during monitoring phase, after installation and unpin the application from taskbar after first launch.

6) Click "I am finished Installing"


7) Launch the shortcut in the configure phase and perform any additional post configuration if needed.


To customize further like adding home page, start screen etc.. check this link.


8) Ensure that all the buttons are clicked and opened so that Maximum functions are captured in the "Feature block One" itself.

9) Click next.Select the OS as per the requirement and select continue to modify using package editor option.


10) Create a powershell script to add a registry in the local machine for single signon. Add the below script ( AddSigninreg.ps1 )  under the Package Files --> scripts tab in package editor.

set-location hklm:
new-itemproperty -path "HKLM:\software\policies\Google\Chrome\" -name "SigninAllowed" -propertytype dword -value 0 

Similarly  add the below script ( RemoveReg.ps1 ) 

Remove-Item -Path 'HKLM:\SOFTWARE\Policies\Google\Chrome' -Recurse


11) Save the package.

12) To execute the above scripts,  edit the Google Chrome_DeploymentConfig.xml file.

<MachineScripts>
      <AddPackage>
        <Path>powershell.exe</Path>
        <Arguments>-ExecutionPolicy Bypass -File ".\AddSigninreg.ps1"</Arguments>
        <Wait RollbackOnError="true"/>
      </AddPackage>

      <RemovePackage>
        <Path>powershell.exe</Path>
        <Arguments>-ExecutionPolicy Bypass -File ".\RemoveReg.ps1"</Arguments>
        <Wait RollbackOnError="true" />
      </RemovePackage>
    </MachineScripts>

13) Save the Google Chrome_DeploymentConfig.xml file.

14) Testing the package using standalone powershell.

Enable script execution in the App-V client using the below command in powershell.

Set-AppvClientConfiguration -EnablePackageScripts 1

Publish the Google Chrome App-V package:

Add-AppvClientPackage "path to .appv file" -Dynamicdeploymentconfiguration "path to Google Chrome_DeploymentConfig.xml" | Publish-AppvClientPackage -Global | mount-AppvClientPackage

Tuesday, April 5, 2016

Sequence WinZip 19 - App-V 5.1

Download the source and extract the windows installer (.msi) file from %temp% location.

Start the sequencing step using App-V 5.1 Sequencer.

1. Select create a new virtual package.


2. Select create package.


3. Select standard package.


4. Select custom installation.


5. Type the name of the virtual package as WinZip 19.0.


Click Next and run the installation of the msi file in the CMD as shown below.


If you want to customize further using the PUBLIC Properties during installation with the msi, have a look in the below links.

http://kb.winzip.com/kb/entry/11
http://kb.winzip.com/kb/entry/229/

Remove the desktop shortcut.

6. Click I am finished Installing once installation is completed.


7. In the configure software phase, launch the main shortcut and enter the registration details if you already have. Once the application opens, close it. Do this for at least 2 - 3 times. Launch again and keep the shortcut open and run the following command in CMD Prompt.


 reg add "HKCU\Software\Nico Mak Computing\WinZip\WinZip" /v AssocMsgExe /t REG_SZ /d 0 /f

Close WinZip app and open it again for the last time.

NOTE:

This step is done in order to suppress the below popup window from occurring in the client side after publishing and launching the shortcut.


8. In the Installation Report, You can notice that App-V has detected DCOM object. As all know DCOM is not supported by App-V 5.1 too. Just click on close and skip to next.

NOTE - I have done basic functionality tests alone and it seems to work fine without any issues. If anyone come across any issues because of this kindly report me back.


9. In the streaming phase, execute the shortcut if you want to capture feature blocks. If not click next to fault stream.


10. At the "Create Package" stage select "Continue to modify package without saving the package editor"


11. Check in the "Virtual Registry" tab whether the registry is captured properly.

REG_SZ AssocMsgExe with value 0 is under USER\[{AppVCurrentUserSID}]\Software\Nico Mak Computing\WinZip\WinZip.


If it is present, click File and save the package.

NOTE:

Adding AssocMsgExe to the Virtual Registry inside the Package Editor after the monitoring phase or configuring phase will not suppress the prompt. It needs to be done only during the monitoring phase or configuring phase.

Wednesday, March 30, 2016

Sequence Visio Viewer 2010 - App-V 5.1

You can download the source from the below link.
https://www.microsoft.com/en-in/download/details.aspx?id=21701


Before to sequencing the Visio Viewer 2010 application, take some sample drawings created using Visio 2010 that are supported by Visio viewer (files with a .vsd, .vss, .vst, .vdx, .vsx, or .vtx extensions) and place it in desktop or some temp location.


Now start the sequencing steps using App-V sequencer 5.1.

1. Select create a new virtual package.


2. Select create package.


3. Select standard package.


4. Select custom installation and enter the virtual package name.


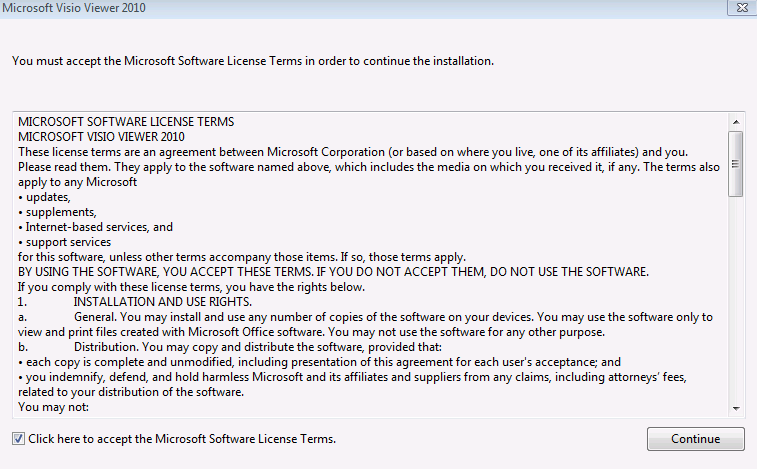
5. Install the Visio viewer 2010 application.


After Installation, click on any one of the extension(Earlier kept in desktop) which will open up Internet Explorer and show the diagram.


6. Click I am finished Installing and continue to modify using package editor.


7. when you click on Virtual registry tab in package editor you can see the FTA extensions being captured in the registries.


8. Remove the Launch Internet Explorer browser from Shortcut and FTA's tab.


9. You can see the FTA's captured. (.vsd, .vss, .vst, .vdx, .vsx, or .vtx extensions)


10. Save the package and in the test client machine publish the package (user or global) to test the functionality.Click on any of those extensions(files with a .vsd, .vss, .vst, .vdx, .vsx, or .vtx extensions) and see that it opens up in the Internet Explorer successfully.


11. After publishing, you can see that the files with .vsd, .vss, .vst, .vdx, .vsx, or .vtx extensions are changed to question mark as below.


12. This is because there was no icon set for those FTA's in the sequencer. Open the package and edit the FTA's to change the Icon as desired.


13. You can also use the Dynamic configuration files to edit the icon for those FTA's like below. Change the default icon tag to the location of the icon file.


Wednesday, October 28, 2015

Sequencing VLC Media Player using App-V 5.1

1)  Launch the Microsoft Application Virtualization Sequencer from Start-> All Programs


2)  Select the create package (default) option.


3) Select the "Standard application" type in the type of application to be sequenced.


4)  Select "Perform a custom installation" in the select installer screen and click next.


5) Provide the virtual application name as VLC Media Player and click next.


6) Install the VLC Media player application now.


Uncheck Desktop shortcut option.


Uncheck Run Vlc Media Player option and click finish.


7) Once Installation is completed, Select "I am finished Installing" and click next.


8) In the configure Phase, launch the required shortcuts and perform custom changes if needed and remove unwanted shortcuts.


Here we have removed all unwanted shortcuts other than the main VLC Media Player shortcut. Launched it and unchecked the check for updates and allow network access.Launched it again to make sure everything is captured in feature block 1.


Click Next.


11) Select stop now to create virtual package and click next.


12) Save the package.

Standalone Powershell Testing in the client side:

Execution Policy should be bypassed first.Then enter the below command in PS to publish the VLC Media Player App-V package.

Add-AppvClientPackage "path to .appv file" | Publish-AppvClientPackage -Global | Mount-AppvClientPackage

Shortcut Location:


Shortcut launch: